
If, like me, you’ve ever liked the idea of creating something functional from fire, steel and sweat; the blacksmithing experience at Oldfield Forge in Herefordshire offers just that. Located on a working farm in a particularly picturesque part of the countryside it’s a great alternative campervan trip idea. A trip where you’ll come away with something usable and maybe even a new hobby. We booked onto their 2 day knife forging experience, here’s how it went.
Arrival at Oldfield Forge
The first thing that strikes you when you arrive at Oldfield Forge is the charm of the place. After following signs displaying the Oldfield key logo through rolling hills and farmland you arrive to the sound and smell of a roaring forge and the clang of metal tools being moved around ready for the day.

On arrival you sign in at the reception desk in the shop. There are teas, coffee and snacks for purchase as well as an assortment of metalwork made at the forge. At this stage you are asked what sort of knife you want to craft and given a list of general shapes to choose from. We opted for a traditional Japanese Nakiri shape as we wanted something a little different. Important tip: make sure you pre-order an Oldfield Forge pastry for lunch.
"Nakiri" (菜切り), translates to "vegetable cutter." Characterised by its straight-edged, rectangular blade, the Nakiri allows for full contact with the cutting board. This facilitates clean, even cuts without the need for a rocking motion.
Following the standard waiver signing and ground rules you get a health and safety briefing in the forge. This was detailed and engaging but effectively boiled down to wear your protective gear, don’t touch hot things and don’t be stupid. All fair statements when working with flames in excess of 1000°C.
The Process: Step-by-Step
The whole process at Oldfield forge took 2 days from start to finish.
Step 1: The Tang
The “tang” is the portion of the blade that extends into the handle. Tangs can either be full, which run the entire length and width of the handle or a partial tang, which extends only partway into the handle.
After being handed a carbon steel plate our instructor, Ben, walked us through the various blacksmithing tools and their uses. There are a lot more variations on tongs and hammers than I had previously appreciated.
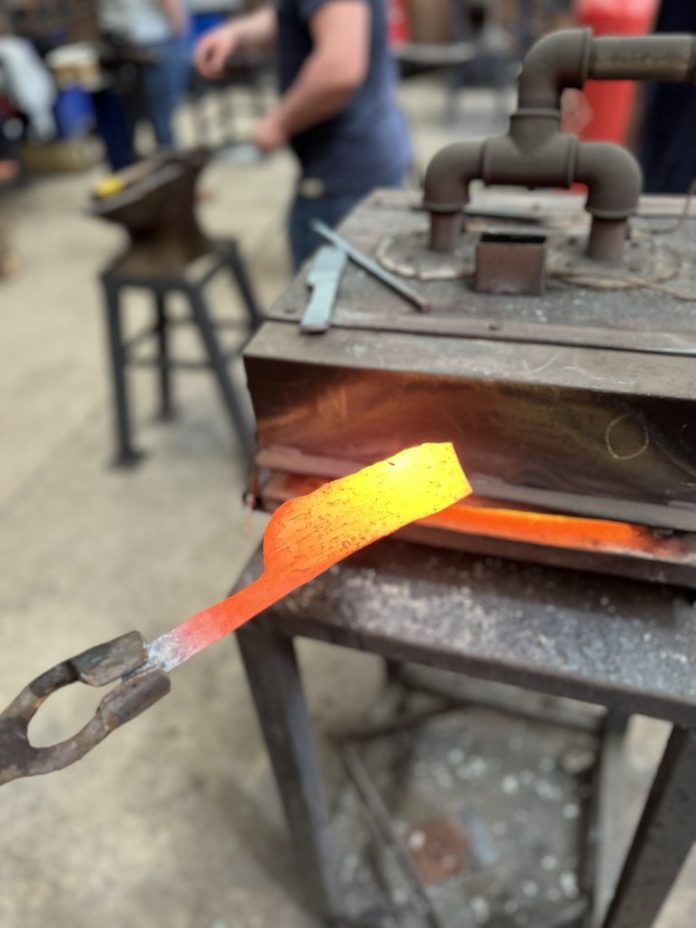
You use plate grip tongs to hold your steel in the forge until it glows yellowish red. Once you’ve reached temperature and your steel is malleable enough you hammer the edge of the glowing billet over the ‘horn’ of the anvil. Ben made this bit look very easy. It was not.
Step 2: Forge Shaping
After many missed hammer strikes we started to get the hang of it. Heat the metal, hit the metal, heat the metal again. Using the flat top of the anvil you work your way outwards to stretch, shape, thin and taper where required. Our chosen knife style meant we didn’t have to taper the end to a point but Ben was on hand to show everyone who needed to how this is achieved.
The hours flew by as you find yourself immersed in the process. Watching a shape slowly emerge from a billet with each poorly aimed hammer blow was a very satisfying experience.
Our knife had a tendency to warp as we attempted to shape it. Although Ben showed us how to flatten and correct the warp we did occasionally just ask him to fix our mistakes. He made it look embarrassingly easy.
Step 3: Annealing
Forging builds up internal stresses within your knife subsequently hardening the steel. Hardness is generally considered a good edge retention property on a finished knife, but our knife was far from finished. We still needed to refine the shape with grinding, filing and drilling – all processes which would be difficult with a hardened lump of metal.
Annealing is the process of heating metal to a critically high temperature and allowing it to cool very slowly. This relaxes the steel and softens the metal. The idea is that you can then grind your newly softened knife far quicker and easier.
At Oldfield we heated the blades in the forges, buried them in an insulating material and then went for lunch.


Step 4: Lunch
We ordered the beef and horseradish pasty’s and they were delicious. £5 each and I’d recommend them to anyone.
The guys at Oldfield Forge have really done a good job of transforming the farm for experience days. There are nice covered areas to eat, games to play or areas to just regain some energy ready for the afternoon.

Step 5: Final Shaping


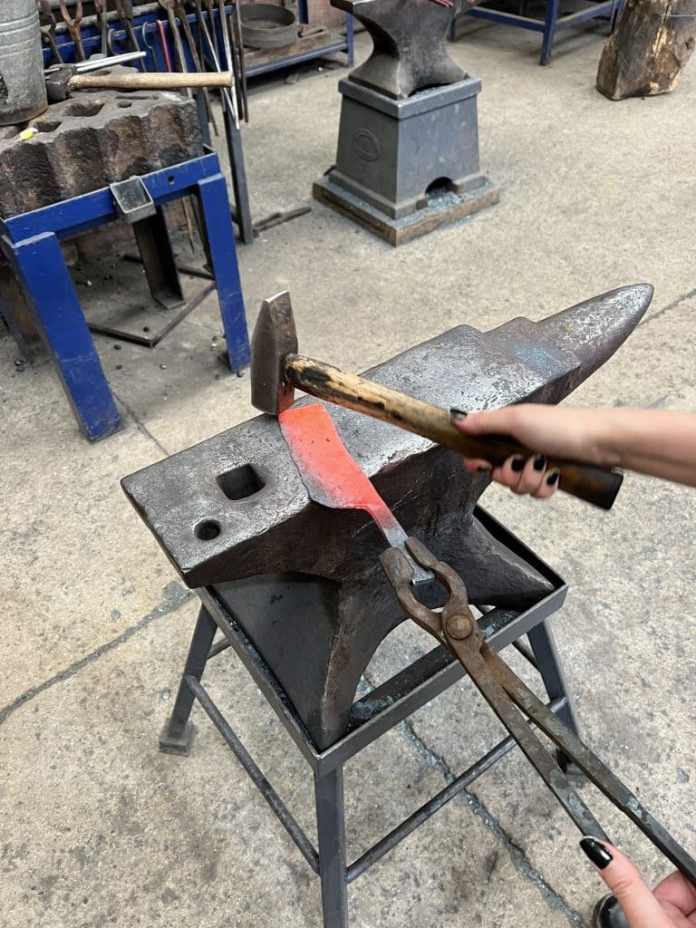
As you can see in the image, we had a pretty terrible bend along the back of the knife after forging. As much as we tried, we couldn’t straighten it out without making a bend elsewhere. But…with the steel now softened; we easily turned our mistake into sparks.
At this point you drill holes in the tang to secure a handle and polish the sides. We wanted our knife to maintain an ‘as forged’ look so we ground off the top surface whilst leaving the hammer marks.
Despite the mistakes and the many blisters on our hands, both of us left Oldfield proud of the knife we had crafted.
Step 6: Quench Hardening

One of the final steps in the process is to harden your knife again to ensure it retains a sharp edge.
Similar to annealing, the first step is to get the knife glowing hot. The difference comes with the cooling. Whereas you let the blade cool slowly to soften you want to rapidly cool and ‘set’ the steel for hardening.
To do this you dunk your red hot knife into a bath of oil. Flames ensue.
The final step at oldfield is one of the blacksmiths grinds a cutting edge into your knife.
Homework
You pack a lot into the 2 days at Oldfield Forge. Because of that, there are a couple of homework items; make/fit a handle and final tempering of the steel.
Looking at their updated website it looks like you can add handle making to your experience. But if you leave, like us, without doing so, you temper your knife (without a handle) in your oven at 220 degrees for 3-4 hours. This slightly reduces hardness but increases resistance to chips/breakage. Once you’re tempered it’s handle time.
I purchased some ‘stabilised wood’ along with some brass pins the same diameter of the holes we drilled at Oldfield. The wood is essentially just some walnut with a nice grain set in a coloured resin. There are a number of good videos on Youtube on how to fit a handle to a knife, but i followed this one.
The Verdict on the Oldfield Forge Experience Day
Forging a kitchen knife at Oldfield Forge was a fantastic experience. The instructors are knowledgeable, patient and genuinely passionate about blacksmithing. I immediately started trying to purchase a forge and anvil for my garden when i got home until i was sensibly discouraged from adding another forgotten hobby to a growing list. But this is testimony to how enjoyable and rewarding it is as an experience. Not only is this a great idea for a different/alternative campervan trip as an experience but you leave with a useable item to be proud of too.

If you find yourself in Herefordshire, or even if you don’t, i can’t recommend Oldfield Forge enough. Whether you’re a complete beginner like us or have some experience with metalwork; their classes are suitable for all levels.
Since visiting it looks like they have added a number of other courses to their website. So if a blacksmithing experience day interests you, you can find their current offerings here:
https://www.oldfieldforge.co.uk/experiences/
I have no doubt we’ll be back to make something else in the future. See you there.


